GeneSpy tutorial
This tutorial will cover most features of GeneSpy, from database preparation to iTOL figures generation.
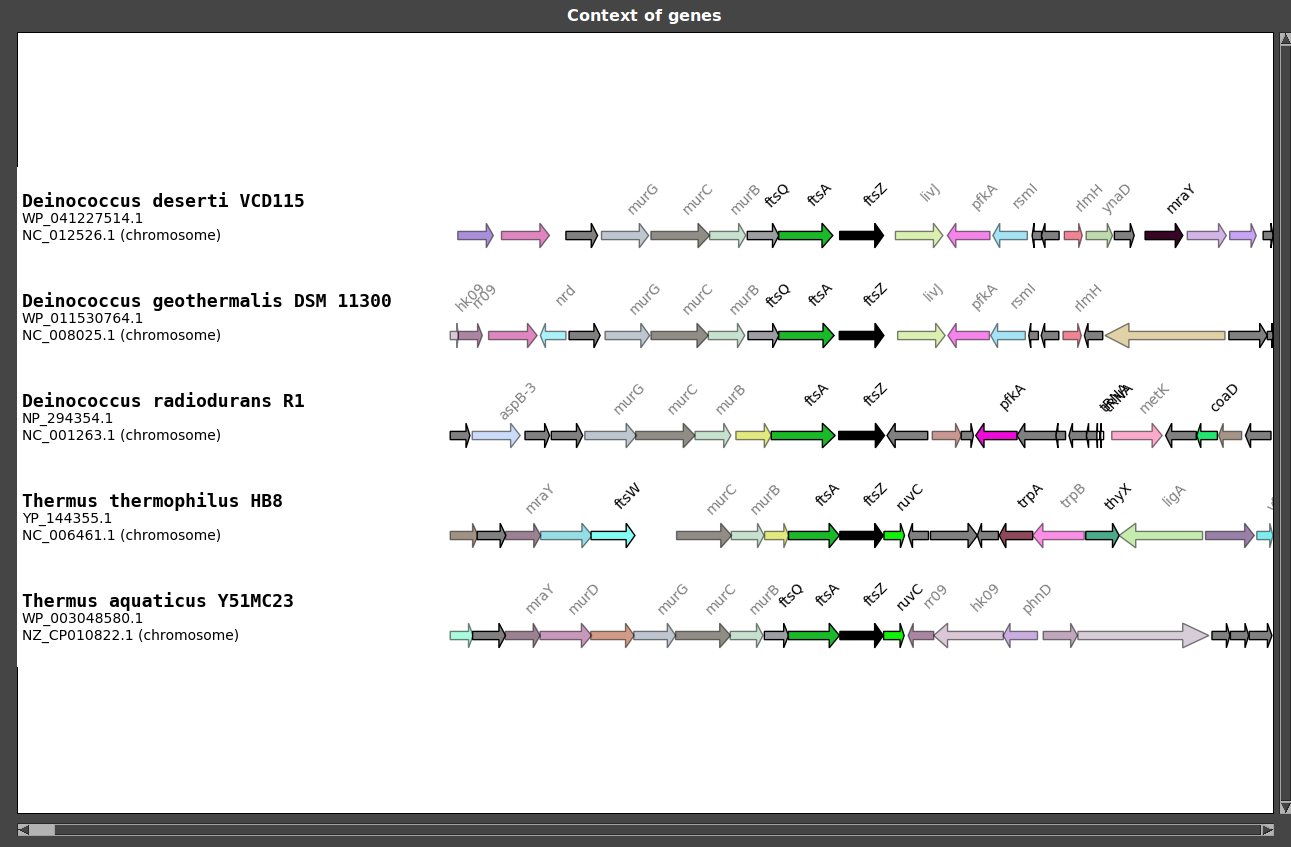
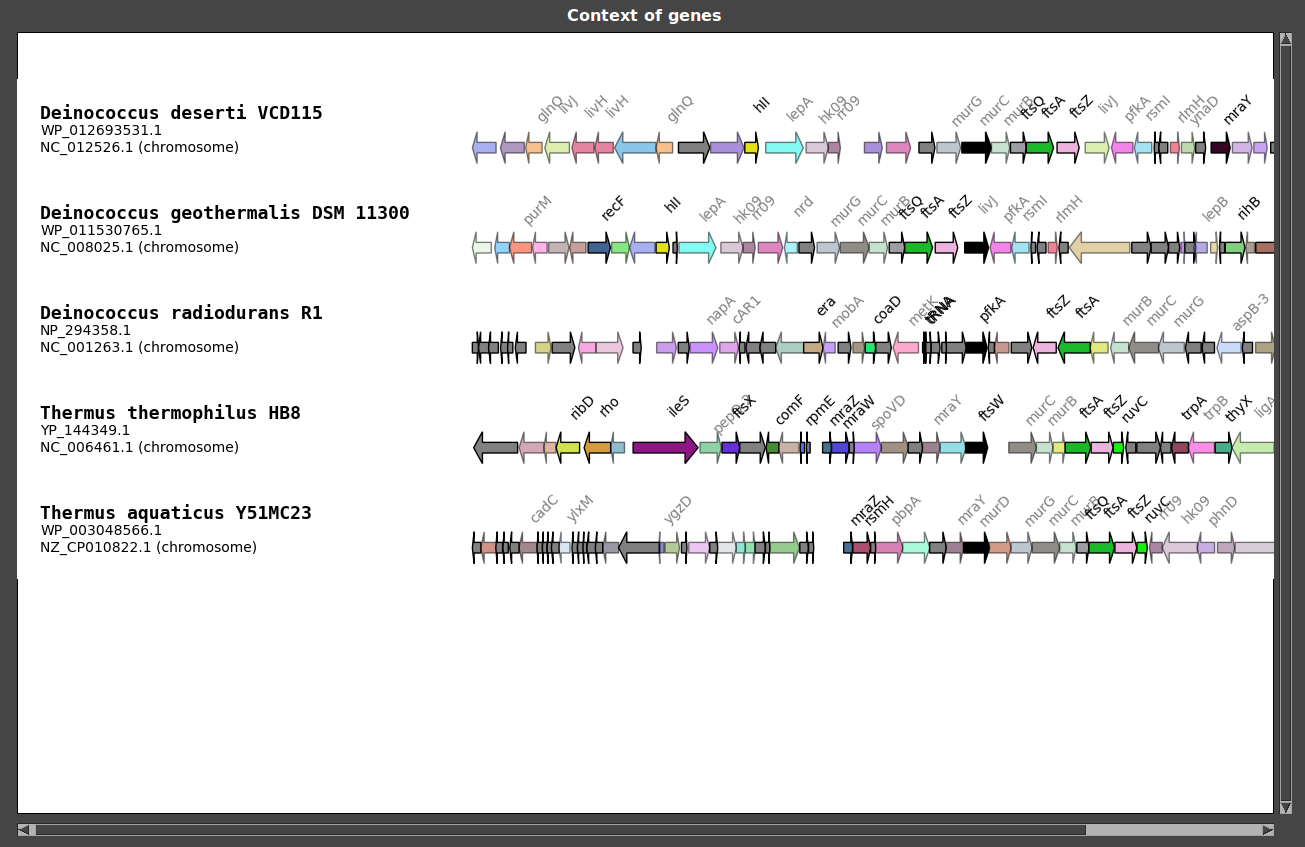
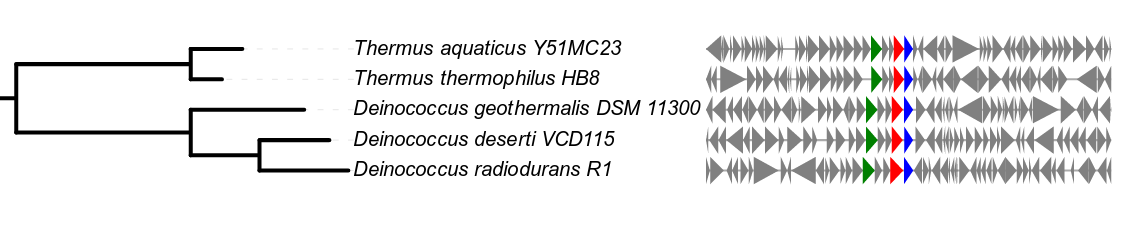
As an example, we will study the genomic context of FtsZ coding gene in some Deinococcus-Thermus. In this tutorial, you will created such a figure:

A set of all needed files is located in GeneSpy/test/.
First step: Building a local database
We need to build a local database composed of GFM files and a list of strains. The construction of database is composed of 3 main steps: * GFF and assembly report files download * GFM construction * list of strains construction.
Using the “3 in 1” module
To facilitate the database building process, we will use the “3 in 1 module” with a NCBI FTP links file already downloaded, “NCBI_FTP_links_test.csv” (see section 3 in 1 module of database construction of the user guide for instructions on how to build your own). This file contains FTP links to 5 genomes: Deinococcus deserti VCD115, Deinococcus geothermalis DSM 11600, Deinococcus radiodurans R1, Thermus aquaticus Y51MC23 and Thermus thermophilus HB8.

Open GeneSpy.py with python and go to Menu>Database>Basic database building.
Select RefSeq.
Select the “test/NCBI_FTP_links_test.csv” file.
Select the destination repertory (test/Database/ is provided for this purpose).
Click Go!
Wait…
If no connection problem occurred, a database has been built in the directory that you selected! Furthermore, with the “3 in 1” module, the database is automatically selected.
Looking at the output
Results of all steps of database building are displayed in the dialog box :
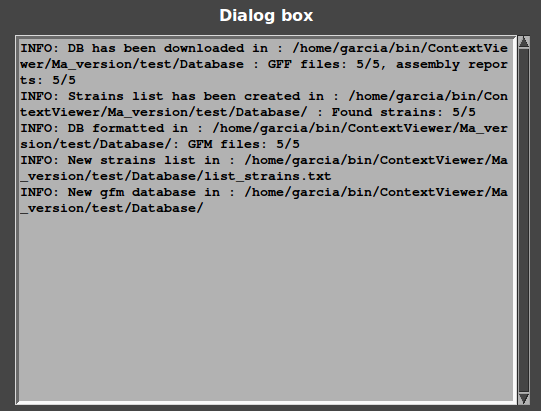
First line: information about download: 5/5 of GFF files and 5/5 of Assembly reports have been successfully downloaded.
Second line: information about list creation: 5/5 of strains names have been found from Assembly reports.
Third line: information about format: 5/5 of GFF have been formatted and converted in GFM.
Last lines: GeneSpy has selected this database.
The database directory should now contain these files :
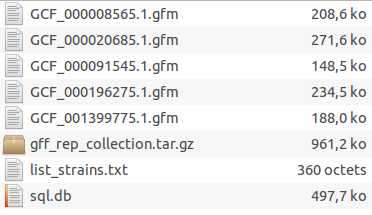
Each GFM file contains all genes of a genome. The list of strains contains the link between GFM files and the strains’ names that will be displayed. The SQL file will be used by GeneSpy to search genes more efficiently.
The state of database is permanently displayed in the box “Database”:

clicking on it displays the list of Assembly numbers and their state (orphan GFM files, orphan strains in list or overlaping genomes).
Editing the strain list
You can easily look at the list of strains in Menu>Edit>Strains list.
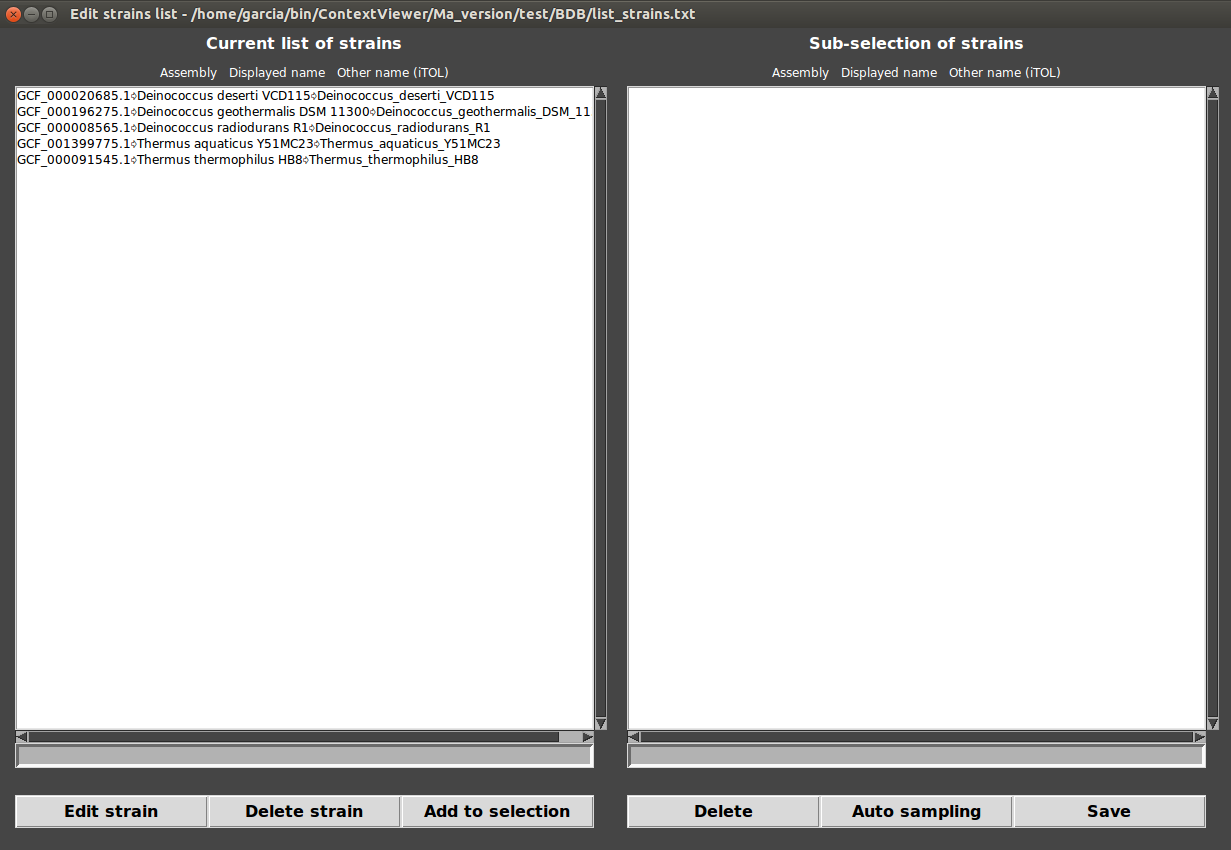
From here, you can edit the names of the strains that will be displayed in your context figures but also make a subselection of genomes.
Second step: Finding target genes
GeneSpy provides many ways to find genes.
from a keyword research
Open Search window in Menu>Search.
Leave the species field empty to query all database.
Type “FtsZ” in “keywords” field.
Press Enter or click on “Search from keywords”.

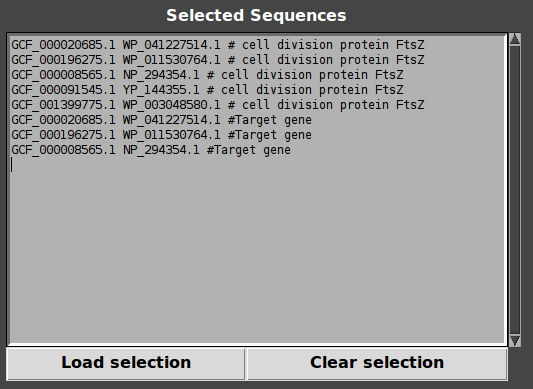
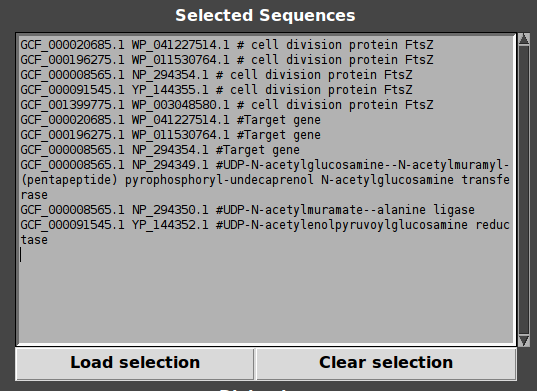
- Click on “Add to selection”, Target genes appear in Selection box.
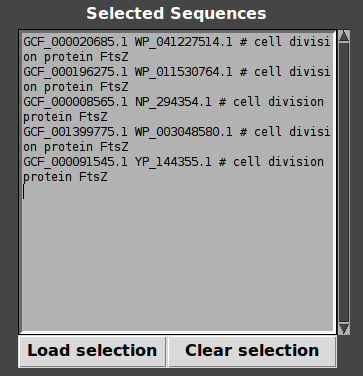
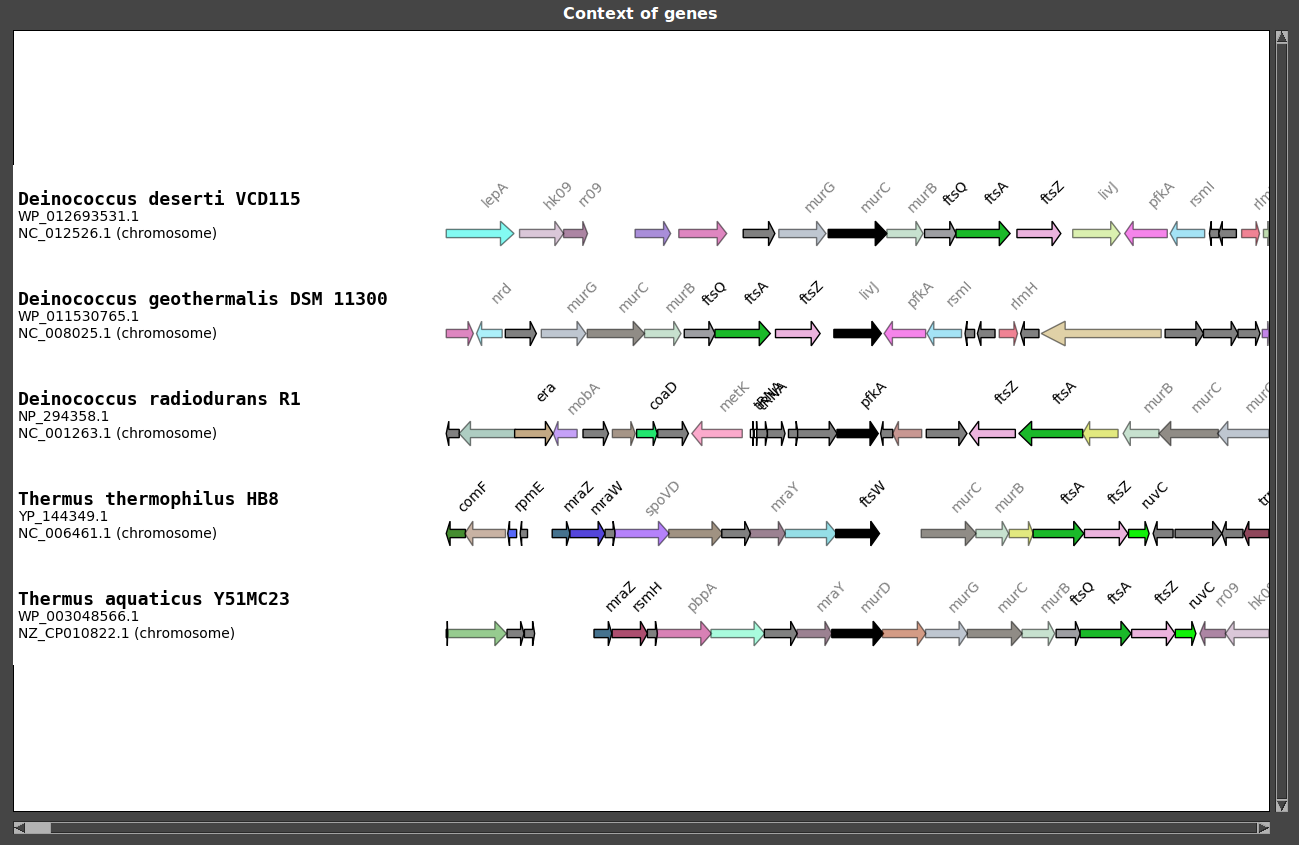
- Load selection : Contexts are displayed!
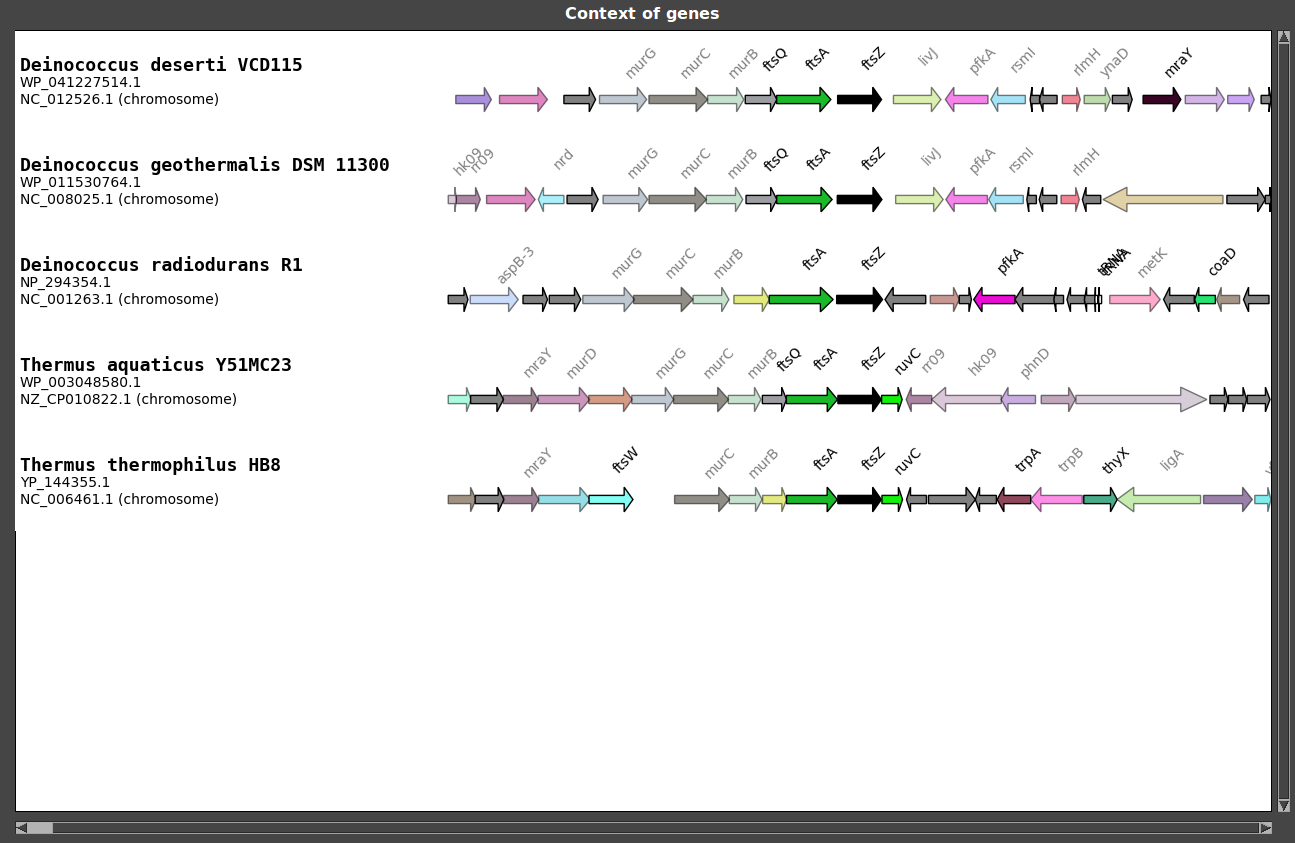
As you can see, FtsZ coding gene is located in the middle of the figure and is colored in black. Target genes are always placed in the middle of the figure.
from a BLASTP at NCBI
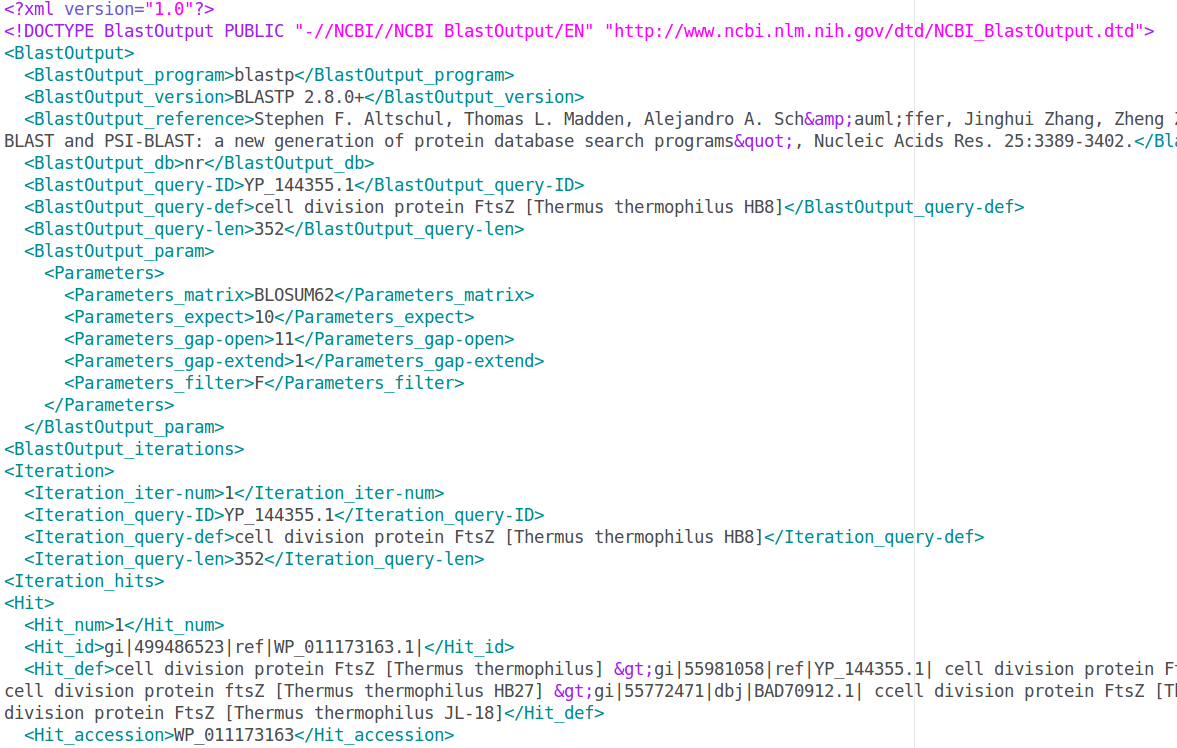
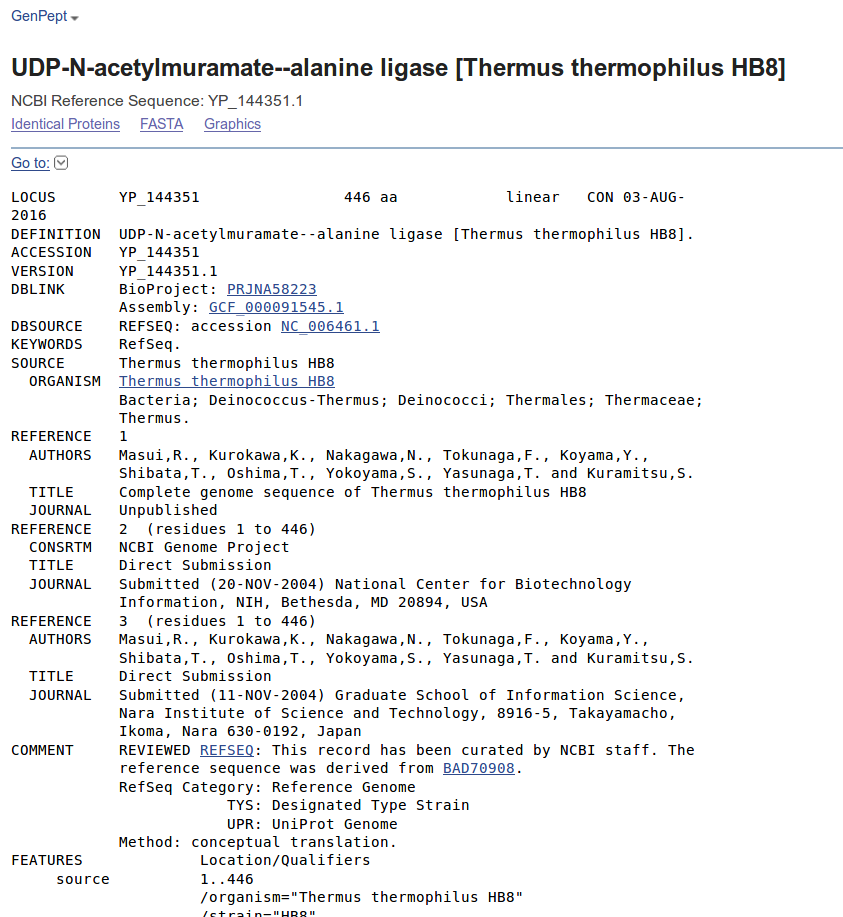
You can find a target gene using a BLASTP performed at the NCBI. A BLAST result file is already prepared for this tutorial. We performed a BLASTP search on the NCBI website using the FtsZ protein sequence from Thermus thermophilus HB8 (YP_144355.1) as query against the database “nr” of “Deinococcus-Thermus” (see User guide>Search target genes>From a NCBI BLASTP result). The results have been downloaded in XML format (Input_file_BLASTP_NCBI_test.xml).
To reset the gene selection from last step, use the “clear selection” in the main window.
In the “Search” window, clear the Search results of the last step (using the “Clear” button).
Click on “from NCBI BLASTP output” in Search window.
Select “RefSeq” (the database you used to build GeneSpy’s database).
Select “test/Input_file_BLASTP_NCBI_test.xml”. Target genes should now appear in Search text box.
Click “Add to selection”. As before, target genes should appear in Selection box in the main window.
- Click “load selection” : Contexts are displayed!
from a local BLASTP
You can find a target gene using a local BLASTP performed on your computer. As always, an example file have been prepared for this tutorial (“Input_file_local_BLASTP_test.txt”). To build your own, see the Using local BLAST result section of the user guide. We performed a BLASTP search using FtsZ sequence from Thermus aquaticus (WP_003048580.1) as a query and a proteic sequence database containing all the proteins encoded by our 5 genomes of Deinococcus-Thermus (DB_Deinococcus_Thermus_protein.faa in test/Protein_database/). The search results have been saved in the default BLAST output format.

GeneSpy will use the accession numbers to display contexts. These accession numbers are WP_003048580.1, YP_144355.1, WP_011530764.1, …
First, clear the Search windows (Clear) and the selection box (Clear selection)
Click on “from local BLASTP output” in Search window.
A window appears with 3 fields. The aim of this window is to extract accession numbers from BLASTP output file.
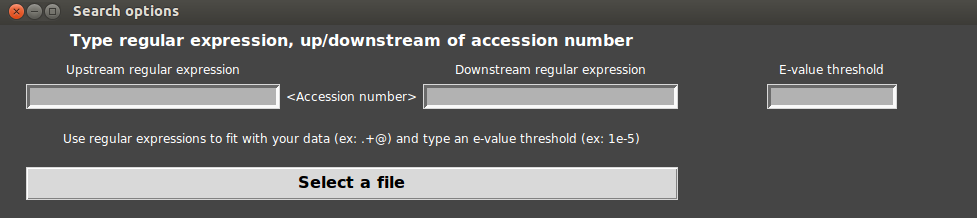
- First, let us look carefully at the BLASTP output file. Accession number is in first position on each line. Then a space separates the accession number from the rest of the line.
- The upstream regular expression has to mean “the begin” : in python the begin is written “^”
- The downstream regular expression has to mean “a space and other characters” : in python this is written “\s.+” (“\s” corresponds to any spacing character, “.” corresponds to any character and “+” corresponds to a repetition of the last character 0 to infinite times). For more examples, see section From a local BLASTP result in user guide.
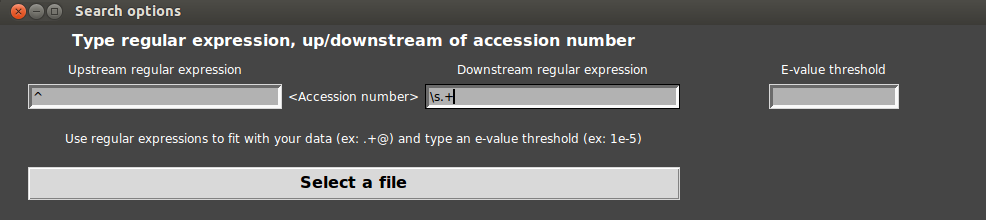
- Then, we have to select a threshold of e-value. For example, let us give a “1e-6” threshold. If you let this field empty, the e-value is set to 0.0001.
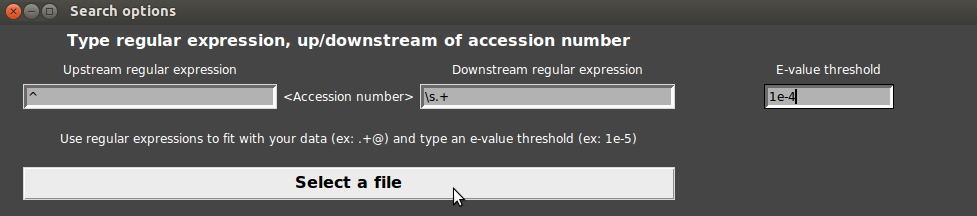
- Finally, click on “Select a file”.
Select “Input_file_local_BLASTP_test.txt”. Target genes appear in Search text box.
Click on “Add to selection”, Target genes appear in Selection box.
Load selection : Contexts are displayed!
From a list of accession numbers
Users can also load target genes from a list of accession numbers. We prepared a file containing accession numbers corresponding to FtsZ genes of the 5 Deinococcus-Thermus.
Go to Menu>Search>From accession list file .
Select the file “test/Accession_list.txt”.
Click on “Add to selection”, Target genes appear in Selection box.
Load selection : Contexts are displayed!
From a GenBank collection
Users can also load target genes from a collection of GenBank files (.gb and .gp). We prepared a collection of four files (GenBank and GenPept) corresponding to FtsZ genes of some Deinococcus-Thermus.
Go to Menu>Search>From GenBank collection.
Select the folder “test/GenBank/”.
Click on “Add to selection”, Target genes appear in Selection box.
Load selection : Contexts are displayed!
Third step: interacting with the interface
GeneSpy offers the possibility to interact directly with contexts to easily navigate along the genomes.
Genes information
First, left-click on any displayed gene, information about the gene should appear in the “Gene information” box, at the bottom of the main window.

Left-click on this box, it opens a NCBI web page of the protein!
Editing genes selection
Right-click on any context, target genes are added to selection!
Double click on any gene, genes are added to selection!
So, now clear selection using “Clear selection”, click on some genes with mouse wheel and load selection. Other genes are targeted!
Fourth step: customizing the figure
To customize the figure, go in Menu>Options. This opens the Options window.
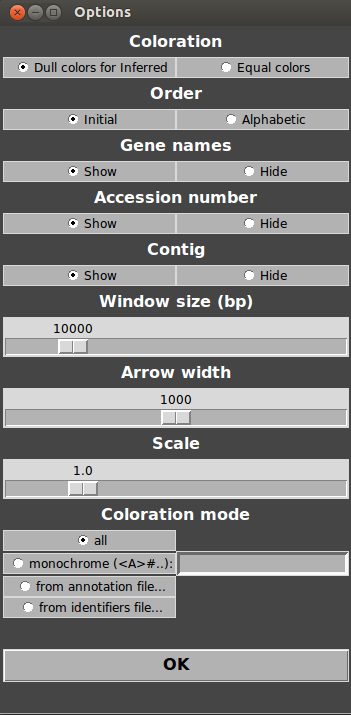
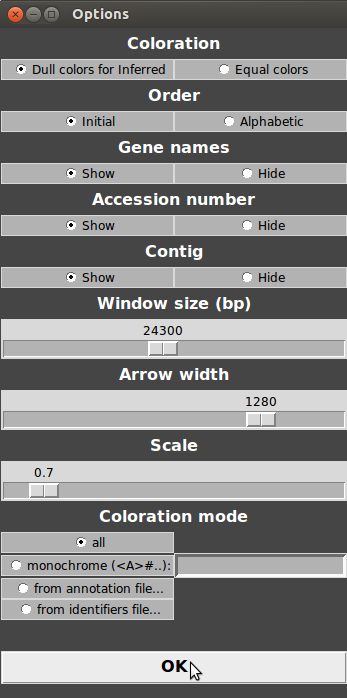
For example, try increasing the windows size, arrow width and decreasing the scale. Then, click “OK” and click on Menu>Refresh. As you can see, the visualized portion of the genome is longer, scale has decreased and arrows are larger!
You can also change the mode of coloration.
Go in Menu>Options.
Click on “from annotation file”.
Select “test/Color_file_test.txt”.
The color file is a simple text file containing colors attributed to gene names:
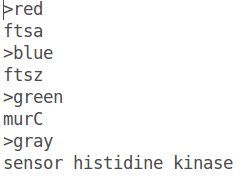
- Click on “OK” and refresh figure.
As you can see, only some genes are colored (FtsA, FtsZ, MurC and hk09).

This also works for functions, locus tag and accession number!
GeneSpy provides the possibility to load a color file containing identifiers in the GeneSpy format: <Assembly><Accession>:
Go in Menu>Options.
Click on “from identifiers file”.
Select “test/Color_file_test.txt”.
The color file is a simple text file containing colors attributed to gene identifiers:
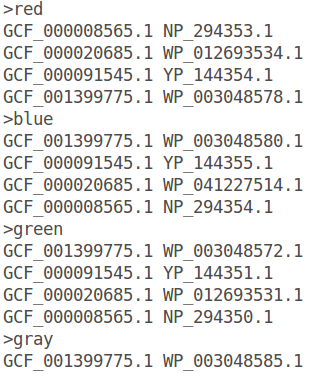
- Click on “OK” and refresh figure.
Fifth step: Saving your work
Saving your gene selection
The selection can be easily saved in “Menu>File>Save as…”. You can now open this file in “Menu>File>Load file…”.
Saving your session
If you want to keep options with your data, you can save the session in Menu>File>Save session… Choose the name of your file, the extension is “.ses”. Now, close GeneSpy and restart it. Click on Menu>File>Open session… and select the previous .ses file. All parameters and identifiers have been saved!
Last step: Exporting figures
Image files
To save the figure, go to Menu>File>Export as…>png. Choose a name of your file. The image has been saved!
iTOL configuration file
GeneSpy provides the possibility to map genomic context on a phylogeny using iTOL. Here, we will map the genomic context of the FtsZ coding gene on a Deinococcus-Thermus phylogeny based on 16S RNA ( prepared in the 16S_RNA_Deinococcus_thermus.tree file):

If you compare names in this tree to those of strains list, they are exactly the same! The match is only possible if names are strictly equal.
Reload FtsZ gene coding contexts (for example by searching with keywords).
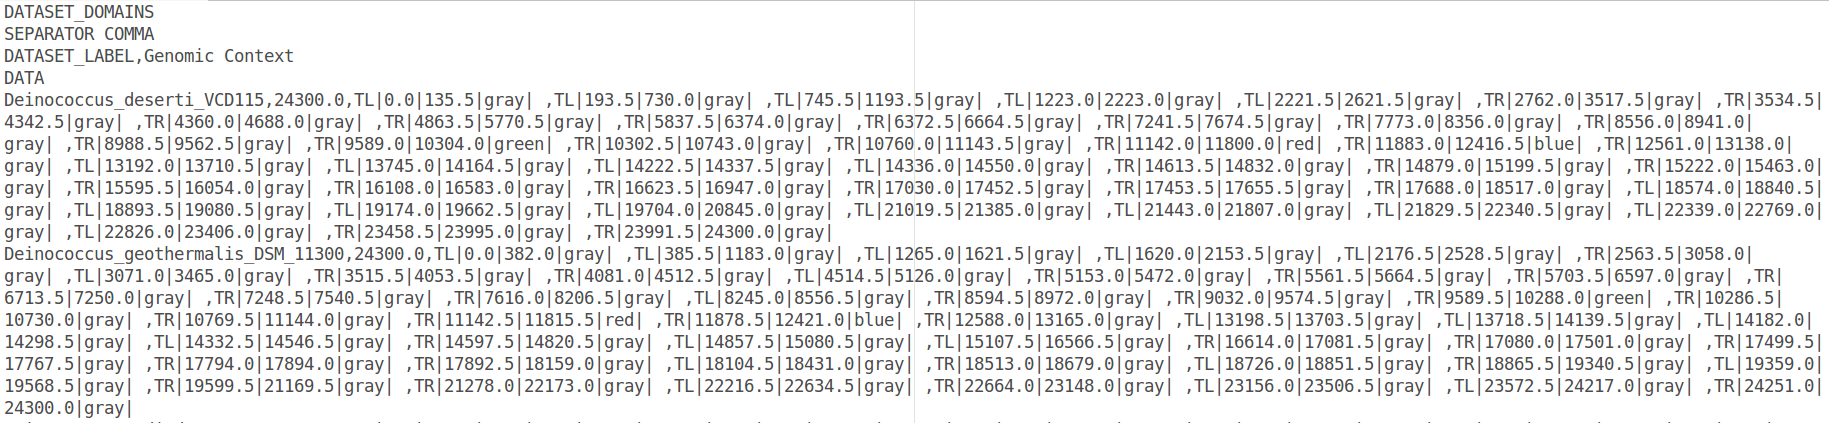
Go to Menu>File>Export as…>iTOL(
). Choose a name of your file and answer “no”. This gives this file:
Go to iTOL web site (https://itol.embl.de/) (you will need to log in)
Upload the tree “16S_RNA_Deinococcus_thermus.tree”
Drag and drop the file containing genomic contexts
The genomic context is mapped on the tree!
© Pierre Garcia. Powered by RMarkdown.